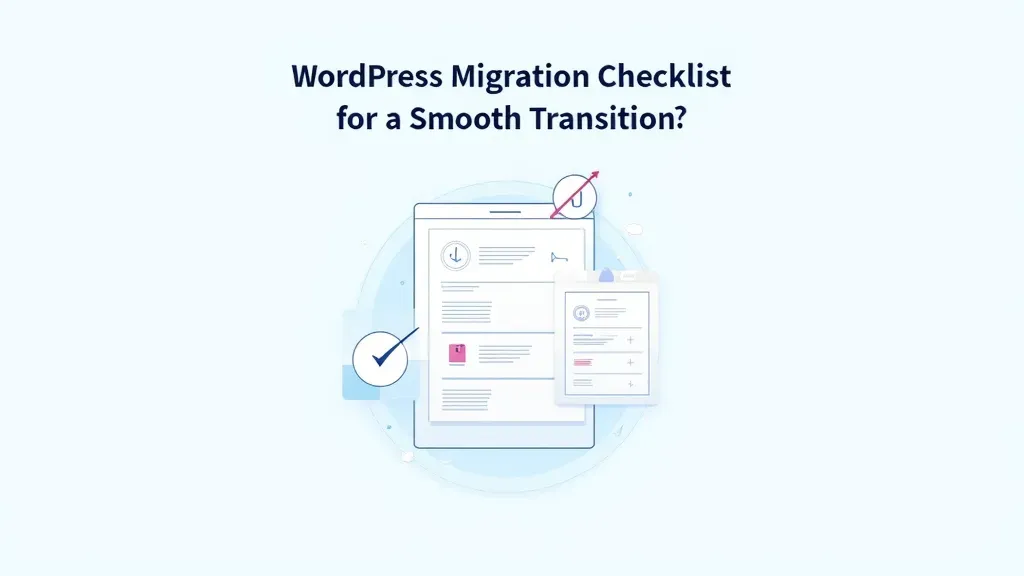
If you’re considering a move to a new hosting service or platform, the WordPress migration checklist is an essential tool for ensuring a smooth transition. This comprehensive guide will walk you through site migration tips and key website migration steps to prevent downtime and maintain your site’s performance. From backing up your WordPress site to testing it fully once migrated, each step is pivotal in preserving your SEO rankings and user experience. Whether you’re migrating to WordPress.com or another host, following a structured WordPress migration guide helps eliminate potential headaches. Prepare to embark on your journey with the ultimate checklist that simplifies the migration process for both beginners and seasoned developers alike.
Navigating the intricacies of relocating your website can seem daunting, but fear not—this ultimate checklist for site migration will serve as your roadmap. As you plan to transfer your content, keeping track of vital steps associated with moving your site is crucial for a successful migration. By outlining essential practices, such as creating backups and examining performance metrics, you can streamline your transition effectively. Each part of this migration guide will help you address considerations that ensure your new site is operational and optimized for visitors. Equip yourself with the necessary tools and insight to migrate with confidence and redefine your online presence.
Essential Pre-Migration Steps for a Successful WordPress Migration
Before embarking on your WordPress migration journey, it’s crucial to take a moment to evaluate your pre-migration steps. This includes planning out the migration timeline and clearly communicating this timeline to your audience. Informing users via email and social media about potential downtime will mitigate confusion and keep them in the loop regarding your site’s status. This upfront preparation can help ensure a smoother transition as it sets realistic expectations around the migration process.
In addition to communication, one of the first steps is to back up your existing site. This means creating a complete backup of both your site files and the database. You’ll want to verify that your backup is restorable in case anything goes wrong during the migration process. Backing up your WordPress site is not just a precaution; it’s a critical step in safeguarding your data, allowing you to revert to a previous version if needed.
How to Effectively Manage Your WordPress Migration
When transitioning to a new WordPress host, managing the actual migration process is vital. During the migration, you can opt for using a reliable migration plugin or the WordPress.com migration service. Each method offers unique advantages, so choose the one that best fits your technical skills and the complexity of your existing setup. It’s also essential to enable maintenance mode while the migration is happening; this will prevent users from making changes and help to communicate that updates are underway.
Moreover, paying attention to your domain management after migration is crucial. Changing your domain settings to point to the new site and ensuring SSL is activated is key to securing data transfers between your site and its visitors. Properly managing these settings not only enhances your site’s security but also promotes trust among your users.
Post-Migration Tips for Optimizing Your New WordPress Site
Once your WordPress migration is complete, thorough testing is essential. Begin by exploring your new site to verify that it looks and functions correctly as it should. This includes checking all URLs and links to ensure there’s no broken content. An audit comparing SEO and performance metrics pre- and post-migration can help you identify any discrepancies. Keeping track of these metrics ensures that your site’s performance aligns with your expectations and your audience’s experience.
Finally, after you’ve made sure everything is functioning properly, it’s time to redirect and monitor your new site. Set up 301 redirects from the old site’s URLs to the new ones; this helps maintain your SEO rankings by informing search engines that your content has moved. Consistent monitoring of key analytics will provide insights into traffic patterns and behavior, enabling you to make informed decisions for future site optimizations.
Key Advantages of Using a WordPress Migration Checklist
Utilizing a WordPress migration checklist has numerous advantages that streamline the process and minimize errors. Firstly, it ensures that you don’t overlook crucial steps, which could lead to complications during or after the migration. A defined list of tasks reinforces a systematic approach to site migration, covering everything from preparation to testing to restore functionality on the new host.
Secondly, a checklist not only boosts your confidence in executing the migration but also provides a roadmap that can be referenced multiple times throughout the process. This is particularly useful for beginners who may be unfamiliar with the technical intricacies often involved in moving a site. With a clear guide, you can proceed through each stage methodically, ensuring a successful transition to your new WordPress environment.
Understanding the Importance of Backing Up Your WordPress Site
Backing up your WordPress site is a foundational aspect of a successful migration strategy. In the event of a mishap during migration, a complete backup allows you to restore your site to its original state, protecting your content and user data. It’s not just enough to assume your data is safe; you must also verify the integrity and reliability of the backup process to ensure that you can recover it should the need arise.
Additionally, regularly backing up your WordPress site even outside of migration times is a best practice that ensures long-term data security. Many users favor using automated backup plugins that regularly create copies of their site data, eliminating the risk of manual oversights. Prioritizing this aspect of website management not only enhances security but also improves overall maintenance efficiency.
How to Optimize Site Performance After Migration
Once the migration is done, optimizing your new WordPress site should remain a priority. Start by monitoring your site’s loading speeds and user interactions closely. Use performance analysis tools to compare metrics before and after the migration, allowing you to pinpoint any slowdowns that may have occurred. If discrepancies arise, you may need to review your hosting plan, plugins, and site architecture to enhance performance.
Moreover, engaging in routine audits of your site’s speed and performance post-migration can reveal areas that may need technical refinement. Factors like image optimization, minimized code and scripts, and effective caching strategies play a significant role in quick load times. By focusing on these elements, not only will you improve user experience, but you will also maintain or enhance your site’s SEO positioning.
Best Practices for WordPress Plugin Management During Migration
WordPress plugins are fundamental to enhancing functionality, but they should be managed carefully during a migration. Before you commence the migration, it’s wise to audit the plugins currently in use. Remove any that are inactive or unnecessary; these can potentially create complications during the transfer. Additionally, keeping only essential plugins helps to reduce clutter and ensures that your site’s new environment does not become bogged down.
After the migration, re-evaluate the plugins you’ve activated on your new site. Ensure they are compatible with your current setup and the latest versions of WordPress and PHP. It’s also an opportunity to explore alternative plugins that may offer better performance or improved functionality. By managing your plugins effectively, you help maintain site stability while enhancing user satisfaction.
Monitoring SEO Metrics After Your WordPress Migration
Monitoring SEO metrics after migrating your WordPress site is essential for long-term visibility and performance. Once the migration is completed, use tools like Google Analytics and Google Search Console to continuously check key performance indicators like organic traffic, page load times, and bounce rates. Analyzing these metrics will help ensure that your site’s SEO integrity is preserved, enabling you to catch any unexpected drops in rankings promptly.
Furthermore, keeping a close eye on how search engines are interpreting your new URLs is vital. After establishing 301 redirects, monitor for any crawl errors or indexing issues. This proactive approach assists in maintaining your site’s search engine visibility and ensures that users arriving at your site can access the content they expect without hurdles.
The Role of Customer Communication in a Smooth Migration Process
Clear communication with your customers during a site migration can serve as a crucial aspect of the transition. Notifying visitors about the move not only prepares them for any changes in their access to the site but also enhances user relations. Sharing information about the migration through newsletters or social media posts fosters transparency and demonstrates your commitment to user experience.
Additionally, establishing clear channels for feedback during the transition is beneficial. Encourage users to report any issues they encounter so that you can address concerns quickly. This responsive approach not only builds trust but also empowers your audience, making them feel valued during the migration process.
Frequently Asked Questions
What are the key steps in a WordPress migration checklist?
The key steps in a WordPress migration checklist include planning your migration and communicating with your audience, enabling maintenance mode, creating and verifying a backup, auditing SEO and performance, preparing your site, practicing the migration, preparing your new WordPress site, transferring your site content, connecting your domain and securing the site with SSL, and testing everything post-migration.
How can I prepare my site for WordPress migration?
To prepare your site for WordPress migration, ensure that all software is updated to the latest versions, remove any unused plugins and themes, create a full backup of your site, and gather all necessary login credentials. It’s also important to audit your site’s current performance and SEO metrics for future comparison.
Why is creating a backup important in the WordPress migration checklist?
Creating a backup is crucial in the WordPress migration checklist as it protects your data from loss during the migration process. A complete backup ensures that you have a restore point to revert to in case something goes wrong during the migration.
What should I do after migrating my WordPress site?
After migrating your WordPress site, make sure to test the site thoroughly to check for any issues, verify that all URLs are working correctly, compare the site’s performance against pre-migration metrics, and enable search engine visibility to allow visitors access to your site.
How do I communicate my WordPress migration to visitors?
You can communicate your WordPress migration to visitors by sending out emails, posting on social media, and displaying a notice prominently on your homepage. Inform them about the reasons for the migration, anticipated downtimes, and the benefits they can expect post-migration.
What is maintenance mode, and how is it used in the WordPress migration checklist?
Maintenance mode is a temporary state you can enable on your WordPress site to inform visitors that the site is undergoing updates or migrations. This ensures that users cannot interact with the site while you perform necessary changes and provides them with a message about the migration status.
What steps should I take during the actual WordPress migration process?
During the actual WordPress migration process, you should move the site content using your selected migration method, manage the domain by updating DNS settings to point to the new site, and ensure that SSL is enabled for security.
How can I ensure my SEO is maintained during WordPress migration?
To ensure your SEO is maintained during WordPress migration, compare your site’s performance metrics before and after the move, and make sure all URLs are redirected correctly. Also, keep your existing content structure and verify that search engines can access your new site.
What should I monitor post-migration for my WordPress site?
Post-migration, you should monitor key metrics such as site traffic, load times, and any error messages. Use analytics tools to track these metrics to ensure there are no issues affecting site performance or user experience.
What common mistakes should I avoid in my WordPress migration guide?
Common mistakes to avoid in your WordPress migration guide include skipping the backup process, not testing the site before going live, failing to inform users about the migration, and neglecting post-migration checks to ensure everything functions correctly.
| Step | Description |
|---|---|
| 1. Plan and Communicate | Schedule your migration during low-traffic times, inform visitors about the process and the benefits. |
| 2. Enable Maintenance Mode | Let visitors know you are migrating by displaying a maintenance message. |
| 3. Create a Backup | Perform a complete backup of your website including files and databases. |
| 4. Measure SEO and Performance | Collect baseline performance metrics to compare after migration. |
| 5. Prepare and Update Site | Update your WordPress, plugins, and remove unnecessary items. |
| 6. Practice Migration | Rehearse the migration process in a secure environment. |
| 7. Prepare New Site | Set up a new WordPress site on the new host with the latest software. |
| 8. Move Your Site | Transfer all files and database to the new host. |
| 9. Manage Domain and SSL | Point your domain to the new site and enable SSL for security. |
| 10. Test and Monitor | Verify the migration success by checking functionality, performance, and analytics. |
Summary
The WordPress migration checklist is essential for ensuring a smooth transition when moving your website. By following the steps outlined above, you can effectively manage the migration process, minimize downtime, and maintain your site’s performance. From planning and communication to testing and monitoring, each step is designed to safeguard your content and enhance user experience. Embrace the checklist for a successful website migration that keeps your audience engaged and boosts your SEO.
If you’re considering a move to a new hosting platform or a different domain, the WordPress migration checklist is essential for ensuring a seamless transition. This comprehensive guide lays out crucial site migration tips that will help you navigate the complex website migration steps while minimizing downtime and preserving your SEO rankings. From backing up your WordPress site to testing performance post-migration, we will delve into the best practices needed for a successful move. With this WordPress migration guide in hand, you can approach your project with confidence, knowing you’re following a proven roadmap. Let’s explore these steps in detail to empower your migration journey.
Embarking on a site relocation can be daunting, but with the right strategies in place, like our migration essentials, you can simplify the process. Migration best practices are pivotal in steering clear of common pitfalls that might arise during a domain change or hosting transition. Developing a checklist for website relocation not only ensures vital aspects are covered but also helps maintain your site’s integrity and performance. Whether it’s about moving to a different service provider or changing your web address, understanding the critical stages of this journey will prepare you for a hassle-free experience. Let’s examine the logistical considerations and techniques that will safeguard your online presence during this significant shift.
**Pre-migration steps:** Before initiating the migration process, it’s crucial to lay the groundwork for a seamless transition. Start by planning your migration; set a date and inform your visitors through newsletters, social media posts, and a visible notice on your homepage. This proactive communication helps manage user expectations and enhances their experience. Additionally, it’s advisable to pause all site activity by enabling maintenance mode using a dedicated plugin. This serves two purposes: it prevents further data changes during migration, and it reassures your audience that the site will soon be back online.
Next, focus on creating a thorough backup of your entire site, which should include both files and the database. Ensure that this backup is stored safely and that you can restore it fully if something goes awry during the migration. With your site backed up, take time to measure your current website performance, documenting SEO benchmarks, load times, and other key metrics. This data will be invaluable for comparing your site’s performance after migration.
Ensure your WordPress site is prepared for the move by updating to the latest software versions, cleaning up unused plugins or themes, and gathering all necessary login credentials. Practicing your migration process in a safe environment is also highly recommended; it allows you to become familiar with the steps involved and helps iron out potential issues before the actual migration occurs. Finally, set up your new WordPress site at the new host, ensuring it runs the latest versions of all software, and verify that search engine visibility settings align with your goals.
**During migration:** The actual migration process is where all your pre-migration planning comes into play. Depending on your chosen method, whether using a migration plugin or WordPress.com’s migration service, start transferring your site’s content and files as planned. While this is happening, manage the domain by ensuring that it points to the new site. Implement SSL (Secure Sockets Layer) immediately to maintain the security of data exchanges between your visitors’ browsers and your site.
**Post-migration:** Once the migration is completed, the work does not end there. Begin by thoroughly testing your new site to ensure everything is functioning as expected. This includes checking that all URLs and links are operational. Compare the new site’s performance against your pre-migration benchmarks to ascertain that SEO and speed have either improved or remained stable. Ensure visibility settings are correct so that both visitors and search engines can access your new site. Finally, monitor analytics closely for a period of time to check for any anomalies in traffic or user behavior. Cancelling your old hosting account should be the last step after confirming that the migration was successful.
By following this comprehensive checklist, you can ensure a well-organized transition to your new WordPress host, minimizing downtime and preserving your site’s performance and SEO integrity throughout the process.